
Whether you call them envelopes or onvelopes, folding your own paper envelopes is easy. All you need is a square piece of paper.
These envelopes are best for lots of seed, or to hold seed capsules as they dry, or to hold cleaned seed, or you can use them to hold a bunch of seed packets. The Seed Bank uses "#1 coin" envelopes to hold seed packets but I like these envelopes better for collecting and storing seed and seed packets.
These envelopes do not need to be taped or glued. Tape is death to small seeds. These envelopes also do not leak or trap seeds like purchased wax paper envelopes or have the problem with static electricity of plastic bags.
I didn't design these envelopes. Robert Gibson sent seeds in these cute envelopes.

The first step is to make a square piece of paper. I like making large envelopes with 81/2 inch square pieces of used or new printer paper.
For small seed envelopes, take an 81/2 inch square paper and cut four 41/4 inch squares. Self-avowed fumble fingered members prefer these over wax paper seed packets.
One thing to keep in mind if using used paper, do not use paper with confidential information on it unless you cut off that part.
I use a paper cutter to get a square piece.
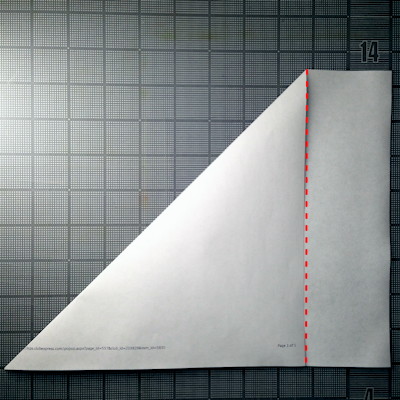
If you want to use a scissors, fold the paper you are using on a diagonal and trim off the excess (red dashed line). This method always makes a square piece no matter what size paper you use.
This example uses standard 81/2 x 11 inch paper found in the USA. For other size paper, your measurements in the next step will be different.
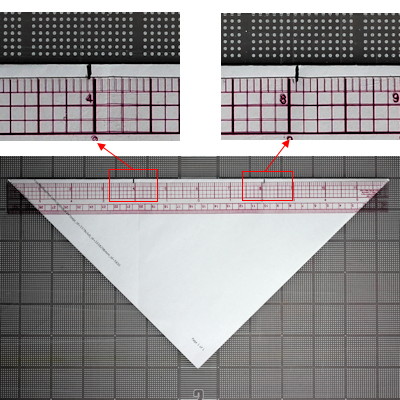
Fold the paper in half to make a triangle. If you cut with scissors, it already is.
Using a ruler mark slightly under one third of the distance in from the points of the fold.
With 81/2 inch square pieces of paper, the long folded edge of the paper will be 12 inches. Mark 1/16 of an inch less than 4 inches from the left side and 1/16 more than 8 inches.
With 41/4 inch square pieces of paper, mark 1/16 of an inch less than 2 inches from the left side and 1/16 more than 4 inches.
You can skip the second mark if you want. When you do the folds, the points should be 1/8 of an inch from the other fold or edge. This helps prevent buckling when you do the tuck step below.
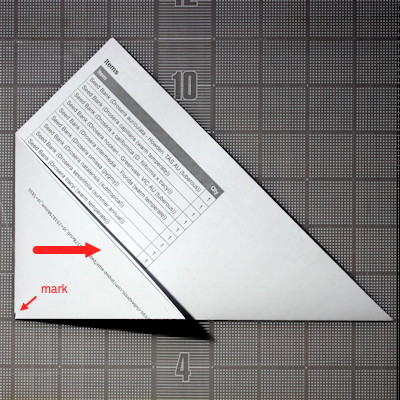
Turn the paper over and fold in the left and right sides using the marks as guides.
First one side.
Then the other side.
Press the folds well.
The points should be 1/8 of an inch from the fold or edge.
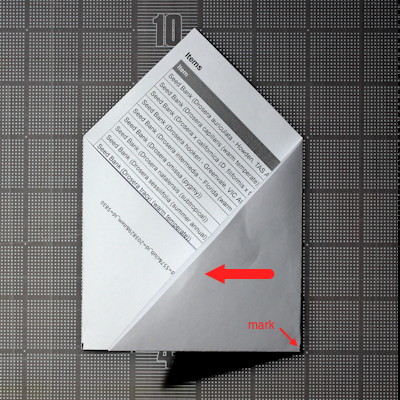
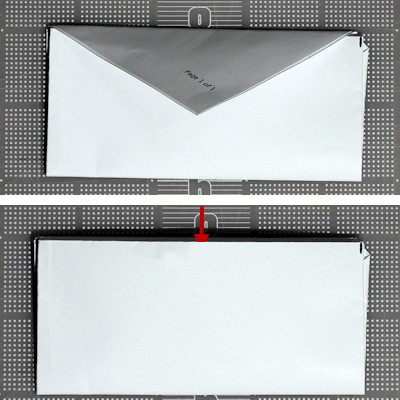
Tuck one of the pointed ends into the fold of the other.
This locks the folds.
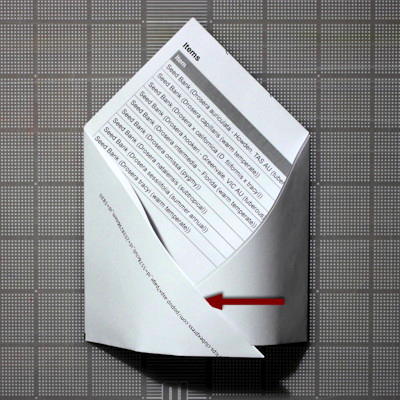
Next we are going to fold in thirds in the other direction.
Fold up the bottom where the red dotted line is to the red dashed line.
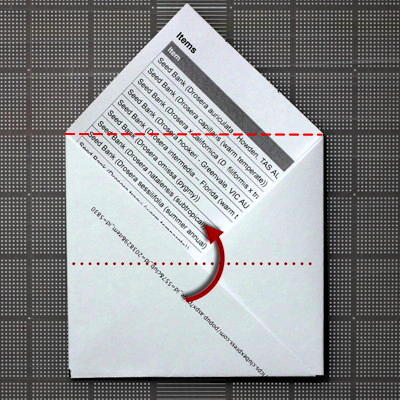
Fold over the top flap.
And then tuck the top flap down between the two folds of the part you folded up from the bottom
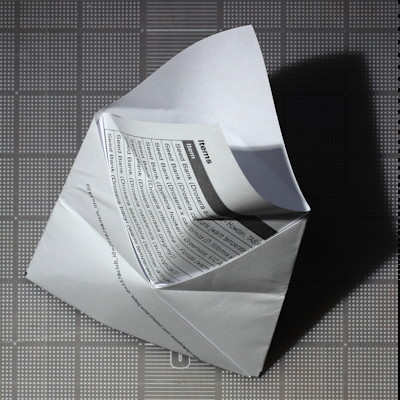
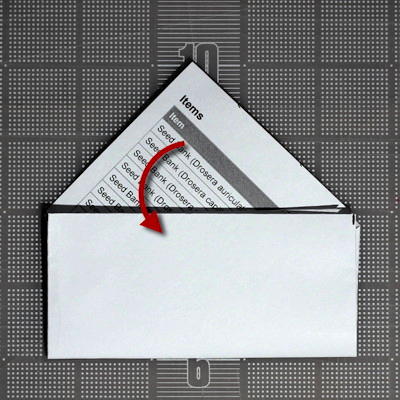
To open the envelope, pull out the top flap, unfold the bottom, and squeeze from the sides.
Now you have an envelope that can hold seeds more securely than anything you can buy.
It isn't absolutely necessary to be this precise in making envelopes. In "emergencies" I have used whatever paper was available, squared it off by creasing and tearing, and eyeballed the rest. The resulting envelopes are not as pretty but work well enough.
-- John Brittnacher