
After a few years in the same pot, a Dionaea muscipula or VFT for short, will get tired or have grown to the edge of the pot and need to be repotted. Repotting is a good time to divide off any side plants and to take leaf pullings to make new plants.
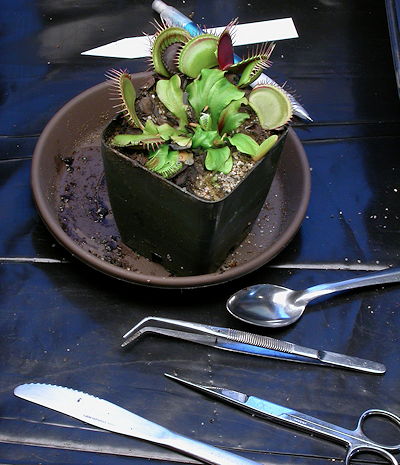
This VFT plant is due for a "hair cut" and a new pot of soil. The first step is to assemble your tools in a location you can get dirty.
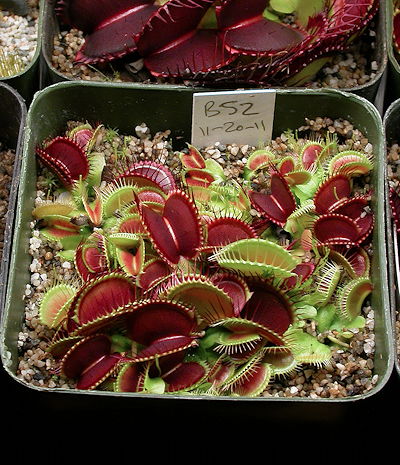
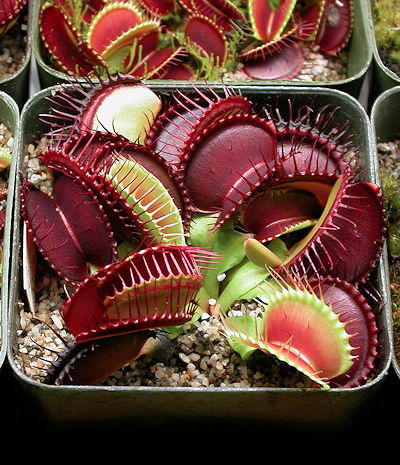
This plant has been growing under lights for a few years. It is in about the smallest and shortest pot I would use for a VFT. For plants outside I use taller and wider pots. The big pots are not because the plant has much in the way of roots—they do not as you will see below. They need tall pots to be the right distance above the water they should always be sitting in. The wider pots are less likely to fall over and they protect what roots the plant does have from temperature swings.
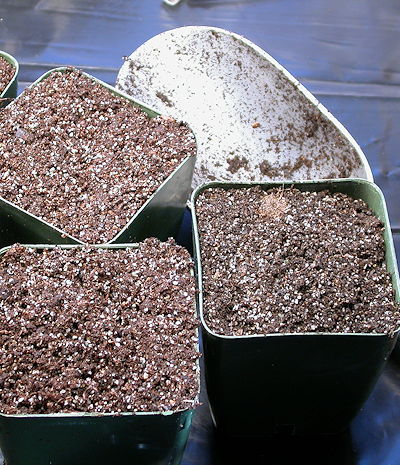
Please see the Sowing Seeds Step-by-Step page on types of soils and managing them. For VFTs I use a peat/sand mix. Note how coarse the sand is. You can use other soils but peat/sand is usually the best.
NEVER use standard planter mix. It has added lime and fertilizer, both of which your VFT will not appreciate. Use of perlite is dicey since it can be salty.
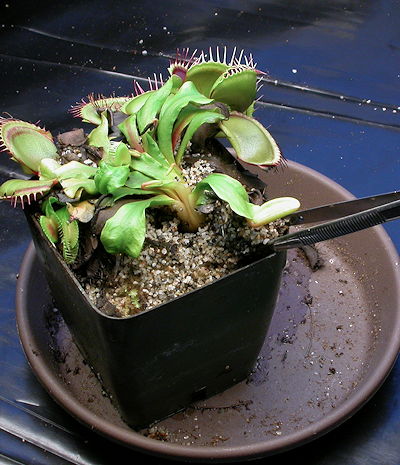
To unpot the plant use your planting forceps. There are other ways of getting the plant out but this works well and is less messy.
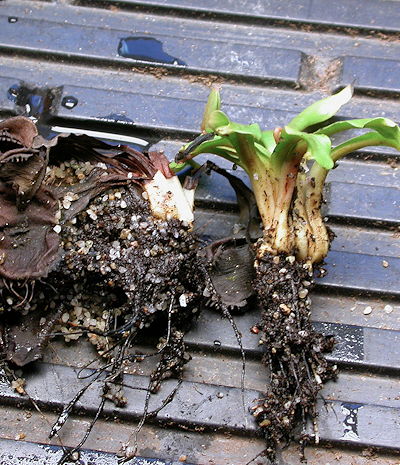
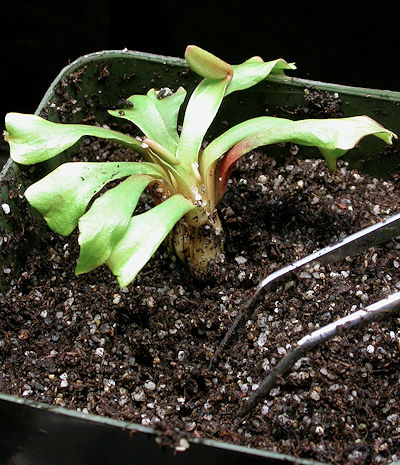
Now look at the plant carefully. (This is a different plant from the one at left.) VFTs have a rhizome with the leaves attached. The old part of the rhizome rots as the plant grows. Break off old part but do not throw out anything yet! You can also remove some of outer leaves around the growing part. Pull out and down so the whole leaf comes off in one piece. Save these leaves too. I do cut off and discard the traps.
Prepare the pot with new soil. If you have good quality pots just reuse the old pot. Make the soil level depth in the pot equal to the length of the white area at the base of the leaves.
You do not have to do it this way but I have found it best in my growing conditions if the plant is grown with the roots and base of the rhizome at peat/sand level and to have the top 1 to 2 cm of the pot with pure sand. However many growers use the peat/sand mix all the way to to top with success.
Before you plant it, determine where the growth point is. The plant will continue growing in that direction so you want to plant it off center so the plant grows toward the center of the pot. It does not have to be way off center.
With your planting forceps poke a hole into the soil and carefully ease the roots into the hole. Then snug in the plant so the rhizome is just into the soil.
Now you can backfill the pot with pure sand and spray the plant with water which helps settle the sand. Put the plant into a tray of water immediately so peat can start fully hydrating.
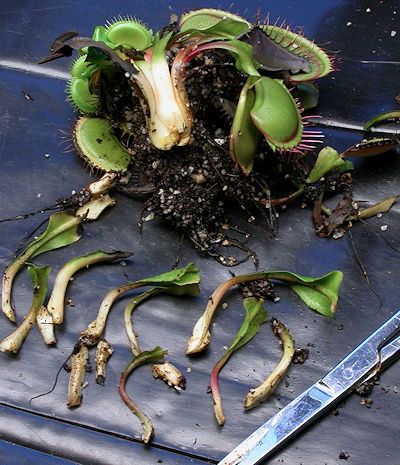
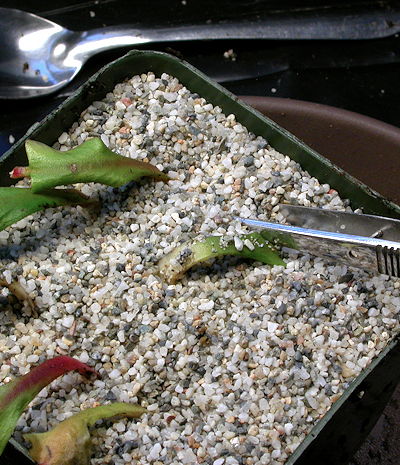
Now back to all the parts we removed. We are going to make new plants from them. Using your dissecting scissors cut off any traps and black parts of the leaves that were pulled off. If a leaf broke off without a hint of the part touching the rhizome chances are it is worthless. All of the ones in the picture are good.
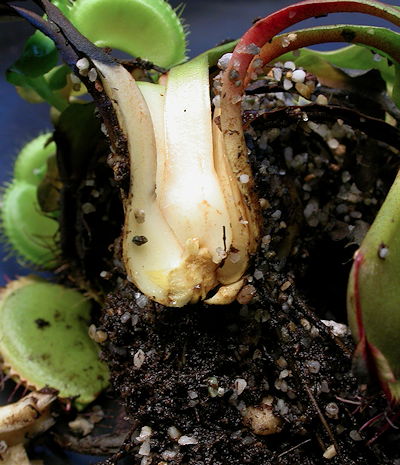
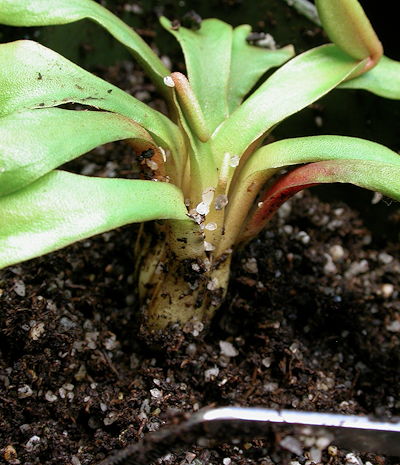
Here is a close-up of the rhizome and leaves.

The center pulling is the best possible leaf pulling. It has a piece of the rhizome with roots. The other two are good because they came off at the rhizome.
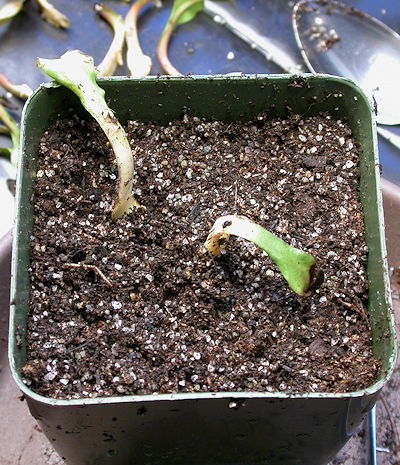
Like we did for planting the plant, leave at least a cm of head space in the pot of soil. Poke a hole and insert the roots of the pullings with roots just like we planted the mother plant. Most of the pullings did not have roots.
Backfill the pot with sand. For the leaves without roots, using your forceps carefully pull the leaf under the sand just into the soil. If you do not think you can do this without damaging the leaves, put in only some of the sand and use your fingers and/or planting knife to set the leaves. Then fully fill the pot with sand.
Spray the leaves well with water and put in a tag with the variety of VFT and the date.
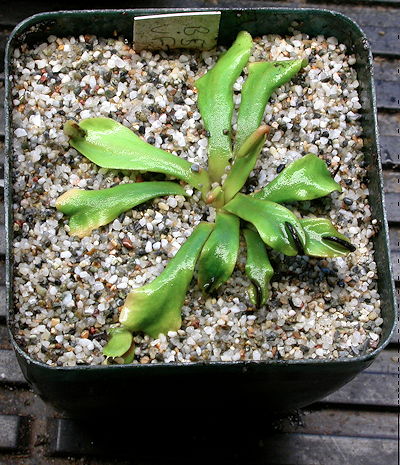
If the pullings do not have any green showing above the sand then put the pot in a tray of water with the parents. If green leaves are above the sand like in the photo above, put the pot in a plastic bag or a sealed terrarium to keep the leaves from drying out too much. Trim the leaves back as they turn black.
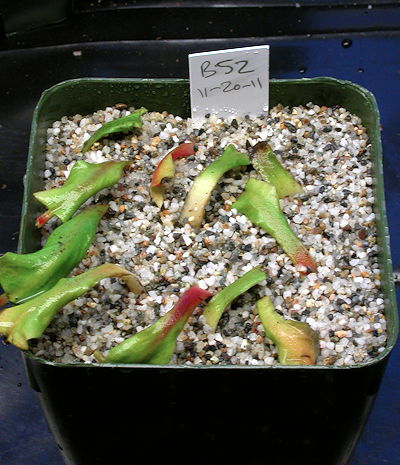
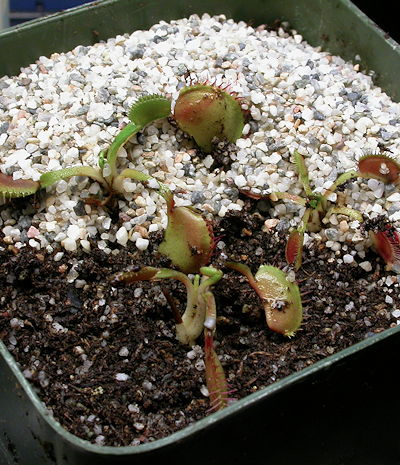
It will take a while to get new plants. Here are the leaf pullings 5 months later. It is time to separate the plants.
Some of those plants are small but you can still feed them with small pieces of rehydrated dried blood worms. Since they are the same clone they will catch up to the larger plants.
These happen to be 3 year old seedlings but could be 5 month old leaf cuttings. Plant them out just like a mature plant.
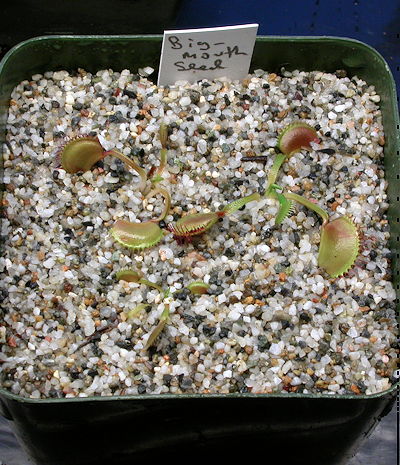
And of course label the pot so you know later what is in it.
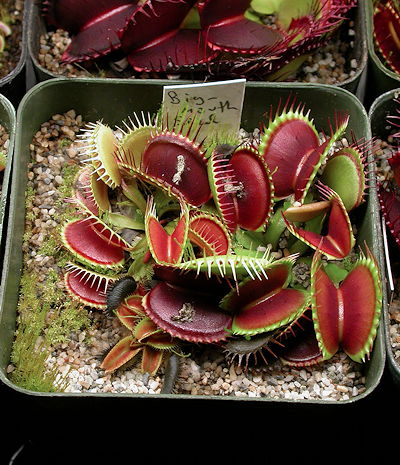
After 5 months the seedlings have grown. You can see the remains of meals in the traps. Note the small plant stayed small. It will be history soon.
The original plant after 5 months. It looks much better now!
-- John Brittnacher