I don't like using old fish tanks as terrariums. I have a number of reasons not the least of which is I don't have one. But even if I did, I find tanks are hard to get into, they have a tendency to get condensation on the inside owing to lack of air circulation, they are hard to clean, and it can be difficult to control temperature and humidity in them. My solution is Plexiglas covers that fit on standard plant trays. My design allows very easy access to the the plants, they have never fogged up, are easy to clean, and can be vented for air circulation.
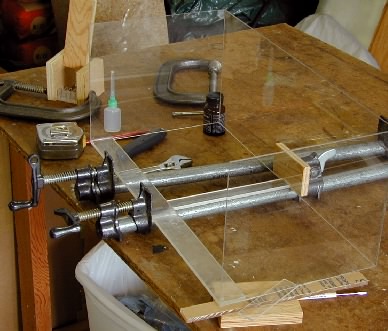
On the down side you do have to make them yourself. Constructing them requires a table saw with a good carbide tipped cross-cut or combination blade and clamps. I use pipe clamps and C clamps to hold the pieces when the solvent is applied. Over time the Plexiglas front may get scratched and have to be replaced.
Remember to NEVER use an ammonia cleaner on Plexiglas as ammonia will fog plastic. Use a Plexiglas cleaner or make your own with RO water, a small amount of isopropanol (rubbing alcohol), and a very tiny amount of detergent.
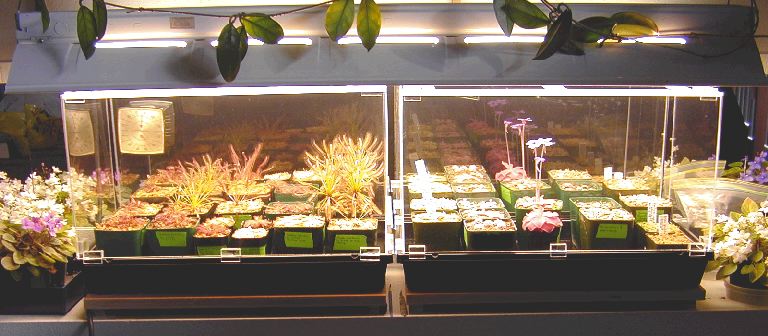
As you can almost see from the picture above, my plants are on a book shelf in my living room. The plant light is a standard 2 bulb, 40 W each, 48 inch fluorescent unit with a reflector hanging from the shelf above it. I got it at a garden supply store 20 years ago. I have seen similar ones in catalogs. I use two Kitchen and Bath bulbs because I like the color the lamps produce and they have the highest lumen rating. Make sure you get name brand 40 W bulbs--you will get higher light output and they will last longer. I lined the reflector with reflective aluminum tape which increases reflected illumination into the terrariums. It also increases heat so I leave about 2 cm of space between the terrarium and the light fixture. You see the plants from the front and back because I have mirror tiles mounted on the wall in back of the shelf. The mirror tiles make a HUGE difference in the amount of light the plants get.
The plant trays are standard 10.5 by 21 inch (27 by 53 cm) size. There is no point giving exact measurements as each brand is slightly different. For strength use two trays for each terrarium. I made the top 10.5 inches (27 cm) tall because that seemed about right. I have since made two more that are 8 inches (22 cm) tall so the plants are closer to the light.
The Plexiglas terrarium top is made from 2 mm, 3 mm and 5 mm Plexiglas. (It may be referred to as 1/16 inch, 1/8 inch and 1/4 inch but the 1/16" is really closer to 3/32" and the 1/4" is more like 7/32".) I used the mix of sizes as I could buy 2 mm in large sheets at a reasonable price at my local hardware store but they wanted twice as much per square foot for 3 mm. The 5 mm pieces were out of their scrap barrel. You need 5 mm for the top but you could use all 2 or 3 mm for the sides. The one on the left above is all 2 mm and the sides are bowed a bit. One one on the right has 3 mm sides and they didn't sag. A good compromise is 3 mm for the sides and 2 mm for the front and back. The cost should be something like $30 total for each one.
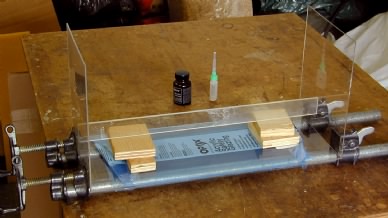
You may be able to get Plexiglas solvent where you also get Plexiglas. My local hardware store says it can't be sold in California any more and to use superglue. I don't know about other states and I don't know about super glue. Superglue may work as well but I doubt it. The jar of Plexiglas solvent I got years ago says "Plastick Acrylic Solvent Cement" and contains methylene chloride in diacetone alcohol. It is nasty stuff. You must use it in a well ventilated location such as outside or a garage with the door open. I apply it with a squeeze bottle topped with a hypodermic needle. You can see this in the assembly photos below.
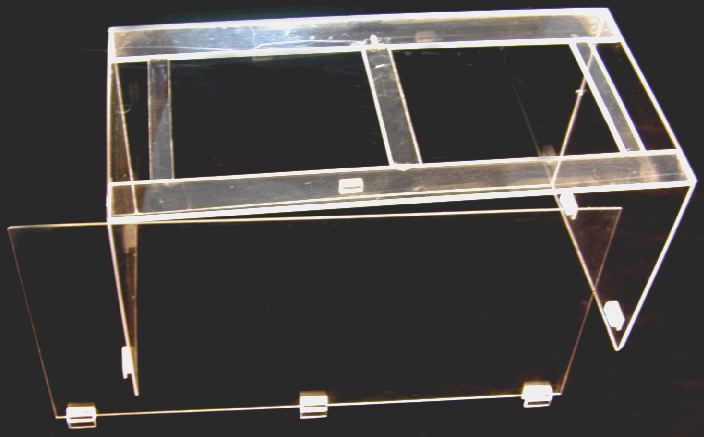
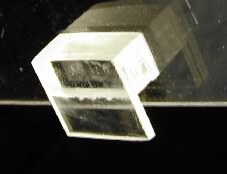
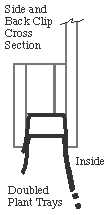
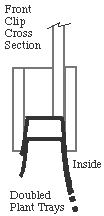
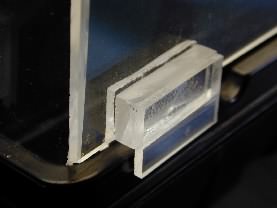
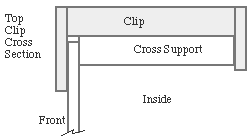
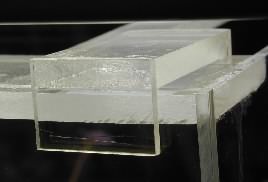
The picture above shows the top without the tray. Note how the front comes off for access to the plants. I forgot to include the top clips in the picture. They are pictured below.
This terrarium cover is revision 1. I now have a rev 2 and have modified my older ones somewhat. The rev 2 doesn't have the support piece across the back of the top. It isn't necessary as I glue 2 mm Plexiglas across the top except a 1 cm gap near the front for the clips. I do still have the other pieces on the top as the thin Plexiglas would sag too much on its own. The original one I made and the rev 1 pictured above have had scraps of 2 mm Plexiglas glued to the top.
Before you start, think about and plan ALL your cuts. Make a sketch with approximate lengths. How tall do you want the total unit with tray to be. How wide will the top be. Take into account the sides and back extend about 6 mm (1/4") into the tray. Take into account the edges slop in a bit so you have to measure 6 mm down into the tray. Don't worry about the corners as you can sand those back.
I presume if you have a table saw and all your fingers left, you can pretty much figure out how to make the top from the pictures. If you have never worked with Plexiglas, make some little holders or other gadgets first to get experience. The trick is to lightly clamp the pieces to be glued first then put in the solvent via capillary action. Gluing the clips I do put the solvent on the face first but then get the edges. I know if you get the pressure right it actually works better to not do it that way...
Here is basically how I build them.
- Set the table saw up with the rip fence and cut the sides and back to the correct height.
- With the rip fence, cut the width of the cross pieces for the top.
- I use a panel cutting jig I made like the one Norm Abrams uses. Use it to cut the width of the back and top cross pieces. They must be EXACTLY the same length. Clamp on a stop to help. Don't forget to subtract the twice the thickness of the sides. And make sure you measure to the correct side of the blade.
- With the panel cutting jig cut the sides to length. Measure from where the back will sit to the back to where it would meet the front--you will need to sand back the front lower edge. If you blow it, use the piece for making the clips. The trick is to measure on the piece you are going to cut. Don't measure with a tape or ruler and then re-measure on the piece to be cut. Make the marks directly on the piece holding it to where it fits. You will be much more accurate.
- Now you can start gluing. First glue the back to the rear top cross piece. Use clamps to hold the pieces together.
- Glue on the sides.
- Glue on the front cross piece.
- Cut and glue on the top braces.
- Sand the bottom corners to make the top fit nicely in the tray.
- Cut the height of the front with the rip fence on the table saw. Mark the height on the piece to be cut against the installed top checking both sides. It needs to be a little short so you can have a 2 mm air gap at the bottom and not have it above the top.
- Cut the front to about 6 mm (1/4") wider that the opening. This is in case the sides sag.
- Make and glue on the bottom clips.
- Make the top clips.
Enjoy.
John Brittnacher
